|
|
Post by the light works on Oct 22, 2013 14:30:15 GMT
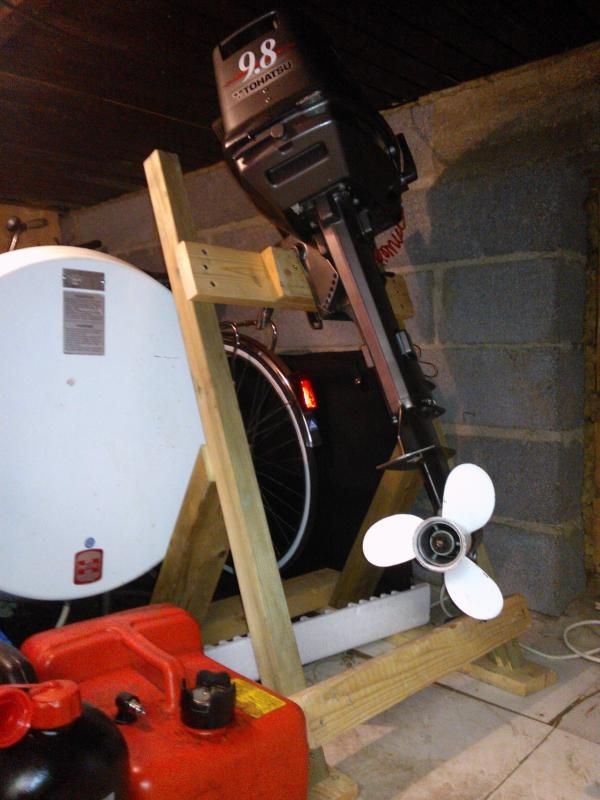
your link appears to have gotten interrupted at the "!" I copied and pasted it in to a new tab, and didn't get the error I expect someone would get if they just clicked on it. it's a nice simple structure - elegant in its functionality. this was my surprise summer project: as in what we presume to be a cigarette ash caught the old one on fire, so a new one had to be built posthaste. addendum: part of last weekend's projects was cremating the remains of the old one. |
|
|
|
Post by kharnynb on Oct 22, 2013 15:39:50 GMT
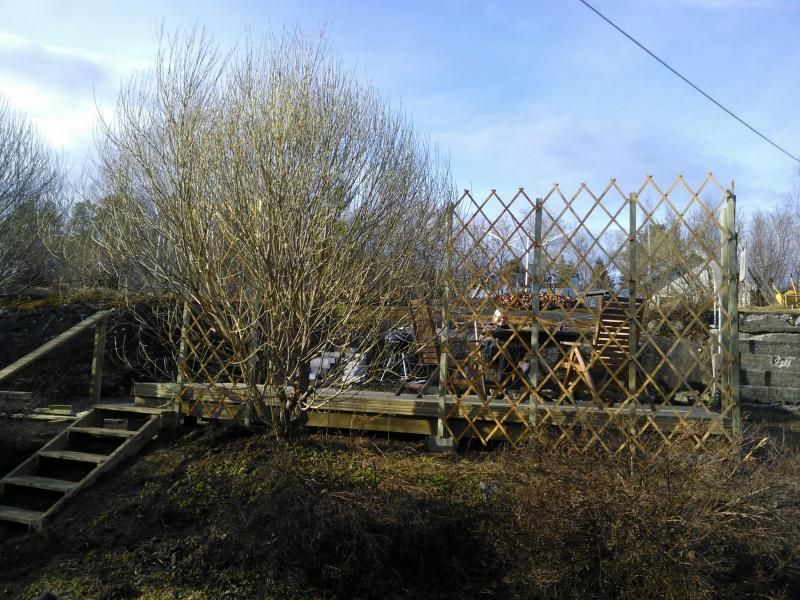
Trying again.  Nice stair, you made the base a bit better than i did with the outside terrace   |
|
|
|
Post by the light works on Oct 22, 2013 15:58:44 GMT
well, surprisingly, they actually had a decent base already there for me to utilize. which makes me wonder how they managed to make the old one sag.
|
|
|
|
Post by kharnynb on Jul 4, 2014 17:55:19 GMT
Finishing up the "swimming dock" at our cottage, just the stairs and cutting down the metal poles to size left.   |
|
|
|
Post by silverdragon on Jul 5, 2014 8:57:24 GMT
That looks sturdy.....
Good job.
Just a question, is there any Ladders at the deeper end of the dock?...
If anyone in the water wants out, can they climb easily?.. I ask as it looks quite a way off the water...
|
|
|
|
Post by kharnynb on Jul 5, 2014 10:06:34 GMT
There will be stairs at the end, i had forgotten the bolts at home...
it's about 25 cm off the water now, but there is a 80 cm waterlevel difference, about 15 higher or up to 50 cm lower.
|
|
|
|
Post by silverdragon on Jul 6, 2014 7:47:37 GMT
You know the number of times I do that?....
Where did I put the bolts, I had them this morning...
Phone home, Wife checks, not where they could be, and then, there they are, in the bottom of the tool box....
|
|
|
|
Post by the light works on Jul 6, 2014 14:41:21 GMT
You know the number of times I do that?.... Where did I put the bolts, I had them this morning... Phone home, Wife checks, not where they could be, and then, there they are, in the bottom of the tool box.... it is not a real workday unless SOMETHING I need wants to play hide-and-seek. |
|
|
|
Post by kharnynb on Jul 6, 2014 18:46:49 GMT
Problem with bolts is, you can't substitute usually for something you did bring along...
screws and nails can be improvised if needed with slightly different lengths or sizes, but there's really no good alternative for a 8mm 10 cm long bolt if you need it...
|
|
|
|
Post by alabastersandman on Oct 6, 2014 1:30:12 GMT
Here's a project I've been pondering for some time now. I had the wood for over a year before I "saw" the project contained within. Even so, I mostly made it up as I went once I got started on it. My wife took these photos with her iPod, she seems to have a pretty good eye for taking pictures. It is made of Red Cedar and finished with three coats of hand rubbed Tongue oil. It's small enough to fit in the limited remaining space of my living room/playroom and big enough to keep my coffee upright under most circumstances Attachment Deleted |
|
|
|
Post by OziRiS on Oct 6, 2014 23:41:43 GMT
alabastersandman, may I just say WOW?! The things you make are just beautiful! I wish I could do something like that, but I honestly don't think I have the patience for it  That said, I need a little advice from you guys, since you clearly know what you're doing. I'm thinking about building a closet in our bedroom to utilize the space in our cramped old townhouse in the best possible way. Being a townhouse, we share a solid brick wall with our neighbors and being old (ca. 1910), that wall isn't insulated in any way, leading to both a lot of noise disturbance (which you don't want in the room you sleep in) and some cold nights during the winter, since our neighbor's hallway (which they don't heat in the winter) is on the other side of that wall. I'm planning on building the closet as a wall to wall, floor to ceiling thing with MDF sheets. I know, it's not as advanced as some of the stuff you guys are doing, but I'm just trying to make the most of the space we have and keep it cheap, durable and functional. Anyway, I'm building it against that wall we share with the neighbors and I'm thinking about starting it off by covering the whole wall with rockwool and drywall to dampen some of the noise. Thing is, our house is a rental, so I need to be able to take it all down again with minimal damage, so I won't have to pay for a complete remodel when we decide to move some day. Also, the floor is a thin laminated wood flooring placed on top of the original floorboards with some insulation material in between, so I can't fasten the beams to hold up the drywall directly to the floor. Question is, will the soundproofing properties of the rockwool+drywall solution be completely lost if I fasten the beams and drywall to the existing brick wall? I imagine the vibrations will just travel through the brick and into the drywall, but I don't know... Also, is it even necessary to soundproof the wall like that when I plan on placing a 2 foot deep closet with all our clothes in it in front of that wall? Might the clothes just do most of the job on its own? |
|
|
|
Post by the light works on Oct 7, 2014 0:14:44 GMT
alabastersandman, may I just say WOW?! The things you make are just beautiful! I wish I could do something like that, but I honestly don't think I have the patience for it  That said, I need a little advice from you guys, since you clearly know what you're doing. I'm thinking about building a closet in our bedroom to utilize the space in our cramped old townhouse in the best possible way. Being a townhouse, we share a solid brick wall with our neighbors and being old (ca. 1910), that wall isn't insulated in any way, leading to both a lot of noise disturbance (which you don't want in the room you sleep in) and some cold nights during the winter, since our neighbor's hallway (which they don't heat in the winter) is on the other side of that wall. I'm planning on building the closet as a wall to wall, floor to ceiling thing with MDF sheets. I know, it's not as advanced as some of the stuff you guys are doing, but I'm just trying to make the most of the space we have and keep it cheap, durable and functional. Anyway, I'm building it against that wall we share with the neighbors and I'm thinking about starting it off by covering the whole wall with rockwool and drywall to dampen some of the noise. Thing is, our house is a rental, so I need to be able to take it all down again with minimal damage, so I won't have to pay for a complete remodel when we decide to move some day. Also, the floor is a thin laminated wood flooring placed on top of the original floorboards with some insulation material in between, so I can't fasten the beams to hold up the drywall directly to the floor. Question is, will the soundproofing properties of the rockwool+drywall solution be completely lost if I fasten the beams and drywall to the existing brick wall? I imagine the vibrations will just travel through the brick and into the drywall, but I don't know... Also, is it even necessary to soundproof the wall like that when I plan on placing a 2 foot deep closet with all our clothes in it in front of that wall? Might the clothes just do most of the job on its own? the clothes will help a lot. I'm almost inclined to say to built it as a friction fit assembly - so you build the back wall to stand between the ceiling and floor, and them have end walls making the whole closet a giant cabinet. then if assembled properly, it can simply be disassembled to remove it. |
|
|
|
Post by kharnynb on Oct 7, 2014 4:10:03 GMT
Make a "wire-frame"box the size of the whole closet, and just use it's "backwall" to mount the plates and sandwich the rockwool.
|
|
|
|
Post by OziRiS on Oct 7, 2014 9:57:27 GMT
Both great suggestions. There's only one problem. I've just made some measurements... The house is so old that the original builders apparently didn't care much for measurements. There's a height difference from the right end to the left end of the wall of 6cm (2,36") from floor to ceiling. Also, the angles from the back wall to each side wall are nowhere near 90 degrees. They're more like 85 and 95 or maybe even 80 and 100 degrees (I haven't bothered taking precise measurements of that yet). I was kind of expecting that, which is why my idea was to attatch the closet/cabinet directly to the walls, instead of making it a stand alone piece of furniture. I was planning to solve the height thing by making one large shelf on top of the closet/cabinet, attatched directly to each end wall, so it makes a uniform height from that point to the floor. This makes it much easier to have the dividing walls of the closet/cabinet sawed to one set length, instead of having to adjust each one for the height difference. Making a wire-frame box, as kharnynb suggested, would be a great idea, except with my construction skills and the tools I have available (not to mention the space I have to work with), making that to fit the irregular measurements of the back wall would be kind of a tall order and I'd probably end up wasting a lot of money on a botched job in a house that I don't even own. Unless my landlord likes what I've done, I'll probably have to take everything down again when we move, which is why I want this to be as inexpensive as possible, while still making it functional, durable and at least tolerable to look at. So, let's forget the soundproofing for a second, since TLW is probably right that the clothes will do a lot, and let's just focus on the build itself. Any suggestions/advice before I start buying materials? Possibly on a minimum of tools needed? Just for reference, here's a plan with measurents that I've drawn up to make it easier for you to envision what I'm trying to do:  A few notes: - The 30cm / 12" shelf height in the left of the three shelf sections is only written once, since I'm planning on making even spacing for all shelves in all three sections, so there's no need to write it more than once - The 140cm / 55" room on the far left is going to be a broom closet, since we've never had one in this house and the vacuum cleaner is constantly being moved around so we don't trip over it. I'm tired of that and now that I have the opportunity to do it, I want it out of the way! The corner of the broom closet might also get to serve as a place for my gun safe, but I'm not a hundred percent on that yet. The overhead shelf in that room will be for cleaning products, rags and such. - The long overhead shelf will be for storing bags and other large things that won't fit anywhere else. - The large room in the middle will have a clothes rack for jackets, dresses, suits etc. and the space beneath it will be for seasonal shoes and boots that we don't want taking up space in the hall when we don't need them. - Since we've dropped the whole sound proofing thing, I'm planning to just screw the dividers directly onto the wall with angle brackets and place the large shelf on top of them, fastening that to both the dividers and the wall. - I have no intention of putting a "floor" in, so the dividers will just be resting directly on the carpet and everything will be fastened to the walls and held in place by fixed shelves. - There are no plans for drawers either. The few shelves that need to be divided for socks and underwear will have plastic or metal mesh boxes for those things. This makes it easier when we're folding clothes on the bed, since we can just take out the box we need, put in on the bed, put everything in it and place it back in the closet when we're done, instead of walking back and forth between the bed and the closet with a handful of socks every few minutes. - Because of the irregular measurements from floor to ceiling, I'm not putting a top on the closet either. The top will simply be the ceiling, so there will be a height difference from that shelf to the ceiling of those 6cm / 2.36" from one end to the other that I mentioned earlier. - Again, because of the irregular measurements and because the size and layout of the room doesn't allow for it, I'm not planning on installing doors. Instead, I'm going with curtains, sliding on a rail fastened to the ceiling. I haven't settled on a design yet, but since the entire room is white, I'm thinking the curtains should have a dark color to offset the room a little. The only other viable alternative to curtains or regular doors would be sliding doors, but making those to fit with the height difference is just going to be a bigger bother and cost than I want to invest in something that's probably coming down again within the next 5 years anyway. Hope all this gives you a pretty clear picture of what I'm thinking. |
|
|
|
Post by kharnynb on Oct 7, 2014 11:29:13 GMT
going with curtains, especially thick ones will also prevent it from being a soundbox for the wall. sliding doors are a bad idea especially if you already have noise issues.
|
|
|
|
Post by OziRiS on Oct 7, 2014 13:37:48 GMT
going with curtains, especially thick ones will also prevent it from being a soundbox for the wall. sliding doors are a bad idea especially if you already have noise issues. So you're with me on the curtain deal? Just making sure I understood you right... |
|
|
|
Post by the light works on Oct 7, 2014 14:21:59 GMT
I have done a couple units that take multiple people to install, but they are basically a slotted together construction. I used a dado saw to cut notches at my desired heights in vertical boards, and then slid my horizontals into the slots. everything was measured such that the end result was a press fit between the end walls
but as far as the irregular measurements are concerned: cut your top and bottom plates, cut your end studs, assemble those in place, and then use whichever one is the most vertical as your spacing reference, and cut each stud to fit. then install your end walls square and work from that. "don't make it true to the world, make it true to the house" is a common expression in remodeling
|
|
|
|
Post by OziRiS on Oct 7, 2014 14:33:50 GMT
I have done a couple units that take multiple people to install, but they are basically a slotted together construction. I used a dado saw to cut notches at my desired heights in vertical boards, and then slid my horizontals into the slots. everything was measured such that the end result was a press fit between the end walls but as far as the irregular measurements are concerned: cut your top and bottom plates, cut your end studs, assemble those in place, and then use whichever one is the most vertical as your spacing reference, and cut each stud to fit. then install your end walls square and work from that. "don't make it true to the world, make it true to the house" is a common expression in remodeling Sounds like a great solution, except I don't have the tools or the skills to make something like that. I could probably learn, but getting the tools would still be too expensive. I'm actually thinking of ordering everything pre-cut to fit, so all I have to do is assemble it. That and if a wrong cut is made, it won't be my fault and I can demand it be redone  |
|
|
|
Post by the light works on Oct 7, 2014 15:01:24 GMT
I have done a couple units that take multiple people to install, but they are basically a slotted together construction. I used a dado saw to cut notches at my desired heights in vertical boards, and then slid my horizontals into the slots. everything was measured such that the end result was a press fit between the end walls but as far as the irregular measurements are concerned: cut your top and bottom plates, cut your end studs, assemble those in place, and then use whichever one is the most vertical as your spacing reference, and cut each stud to fit. then install your end walls square and work from that. "don't make it true to the world, make it true to the house" is a common expression in remodeling Sounds like a great solution, except I don't have the tools or the skills to make something like that. I could probably learn, but getting the tools would still be too expensive. I'm actually thinking of ordering everything pre-cut to fit, so all I have to do is assemble it. That and if a wrong cut is made, it won't be my fault and I can demand it be redone  are you better at calculating cuts than you are at measuring? because if it is cut to your specification and still doesn't fit, then it is your problem. building it in place only takes a saw, a power screwdriver and a bucket of screws. start from the bigger end, and if you cut a stud too short, just use it closer to the short end. |
|
|
|
Post by OziRiS on Oct 7, 2014 16:26:32 GMT
are you better at calculating cuts than you are at measuring? because if it is cut to your specification and still doesn't fit, then it is your problem. building it in place only takes a saw, a power screwdriver and a bucket of screws. start from the bigger end, and if you cut a stud too short, just use it closer to the short end. Problem is I'm better at measuring precisely (even by eye) than I am at making a precise cut. Don't get me wrong, I can follow a straight line, but I always end up slanting the saw just a little bit, no matter what I do. I'm not so worried about the straight line cuts, though. It's more making those cuts for the non 90 degree angle corners that would be so much easier for someone with a tablesaw to do precisely. The closest thing I've got to a power saw is a jigsaw, but I'm afraid that'll be too imprecise for this particular job and I don't want to spend something like $100 on a good circular saw, since I probably won't be needing it again any time soon. |
|